Farm Cameras
I designed and deployed an IP camera network to a farm for security and remote lambing, calving monitoring.
Features:
- Dynamic DNS
- PTZ Camera Installation
- Dome Camera Installation
- Image Analysis
- Trip Zones
- Night Vision
- Secure Offsite Access
- 1km range from Network to DVR
How it Works
Farm Cameras | 2020
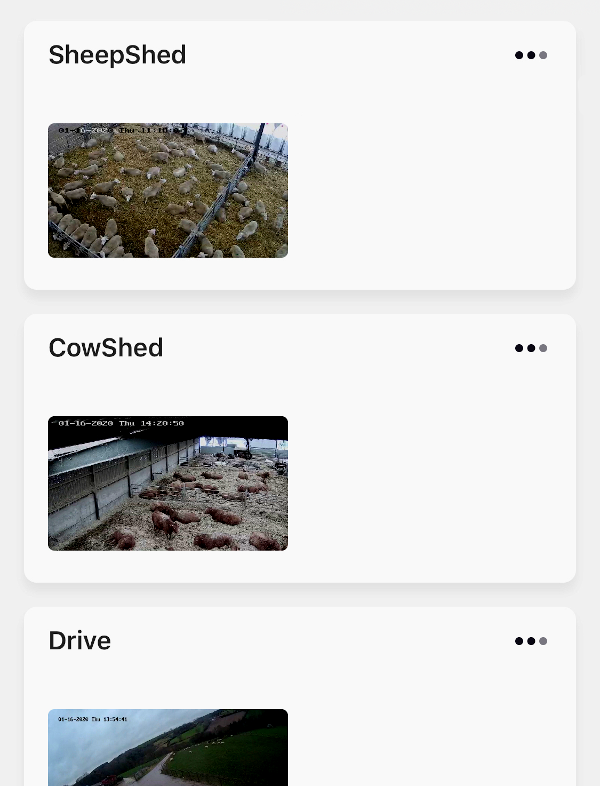
The remit was to provide onsite and offsite monitoring for two large barns. These barns are used for rearing of cows and sheep and during lambing/calving it is advantageous to be able to monitor progress and spot any problem animals. The system needed to work 24/7, in low or no-light conditions and be resilient to the harsh conditions found in agricultural barns.
Step 1 – The Kit
There are several ‘starter kits’ available for barn cameras but these weren’t suitable for this specific application. There was a 1km distance between the barns and the farmhouse locating the main users. The barns were also very large making most camera options redundant due to the coverage.
The final design was a custom network consisting of:
- 2x Hikvision IP PTZ Camera - 2MP with 25x Zoom, 100m Night vision
- 1x Hikvision 4MP IP Dome Camera with WiFi & 30m Night Vision
- 1x Long Range Wireless WiFi Bridge
- 1x 5 Port PoE Network Switch
- 2x POE injectors
- 300m of Cat 6e cable
Step 2 – The Setup
Configuring the Cameras - All the IP cameras run a web portal at the root of their IP addresses. You can use this to configure everything in the camera from video quality, line-detection, security, etc. The only problem I encountered was the need for a legacy Internet Explorer version to view the live stream through the browser, not available on a mac. You can work around this using any free to use DVR software, so it’s not a major issue.
Configuring the wireless bridge - Unique to this setup was a 1km distance between the cameras and the user. This would be impractical to cable, so I used a long-range wireless bridge. Although this introduced latency into the PTZ controls e.g. spinning the camera was slightly delayed, I found the Hikvision app (Hik-Connect) managed the latency very well and almost compensated for it on the PTZ controls. Setting up the wireless bridge involved provided power through POE injectors and then basically pointing the two line of sight devices at each other. The device attached to the DCHP server is setup as the access point, the one attached to the camera network setup as in client mode. These are then paired and secured.
Offsite Access – The final part of camera system setup involved providing offsite (internet) access so the barns could be monitored remotely. The client didn’t have a static IP so I used the dynamic DNS setting of their router in combination with NO-IP. This meant any public IP address changes were registered with the DNS provider and so using the NO-IP domain in any client setting (Hik-Connect), would stay updated with their latest public IP e.g. you enter the domain and port for the camera rather than the temporary public IP address.